Himlung Himal Expedition (7,126m) is one of the best 7000-meter climbing peaks in Nepal, located in the remote Nar Phu Valley near the Tibetan border. Known as the perfect training peak for 8000-meter expeditions like Everest and Manaslu, it offers a combination of high-altitude experience, technical climbing, and cultural exploration.
You can reach the base camp of this peak via the two routes one is the standard Manaslu circuit trek route which takes you to the Manaslu base camp and then the Larkya la pass and to the Himlung Himal base camp. Another route is popular and the easiest which takes you to the Nar Phu valley which is the most hidden places in Nepal and only 1000 travellers are allowed to visit per seasons.
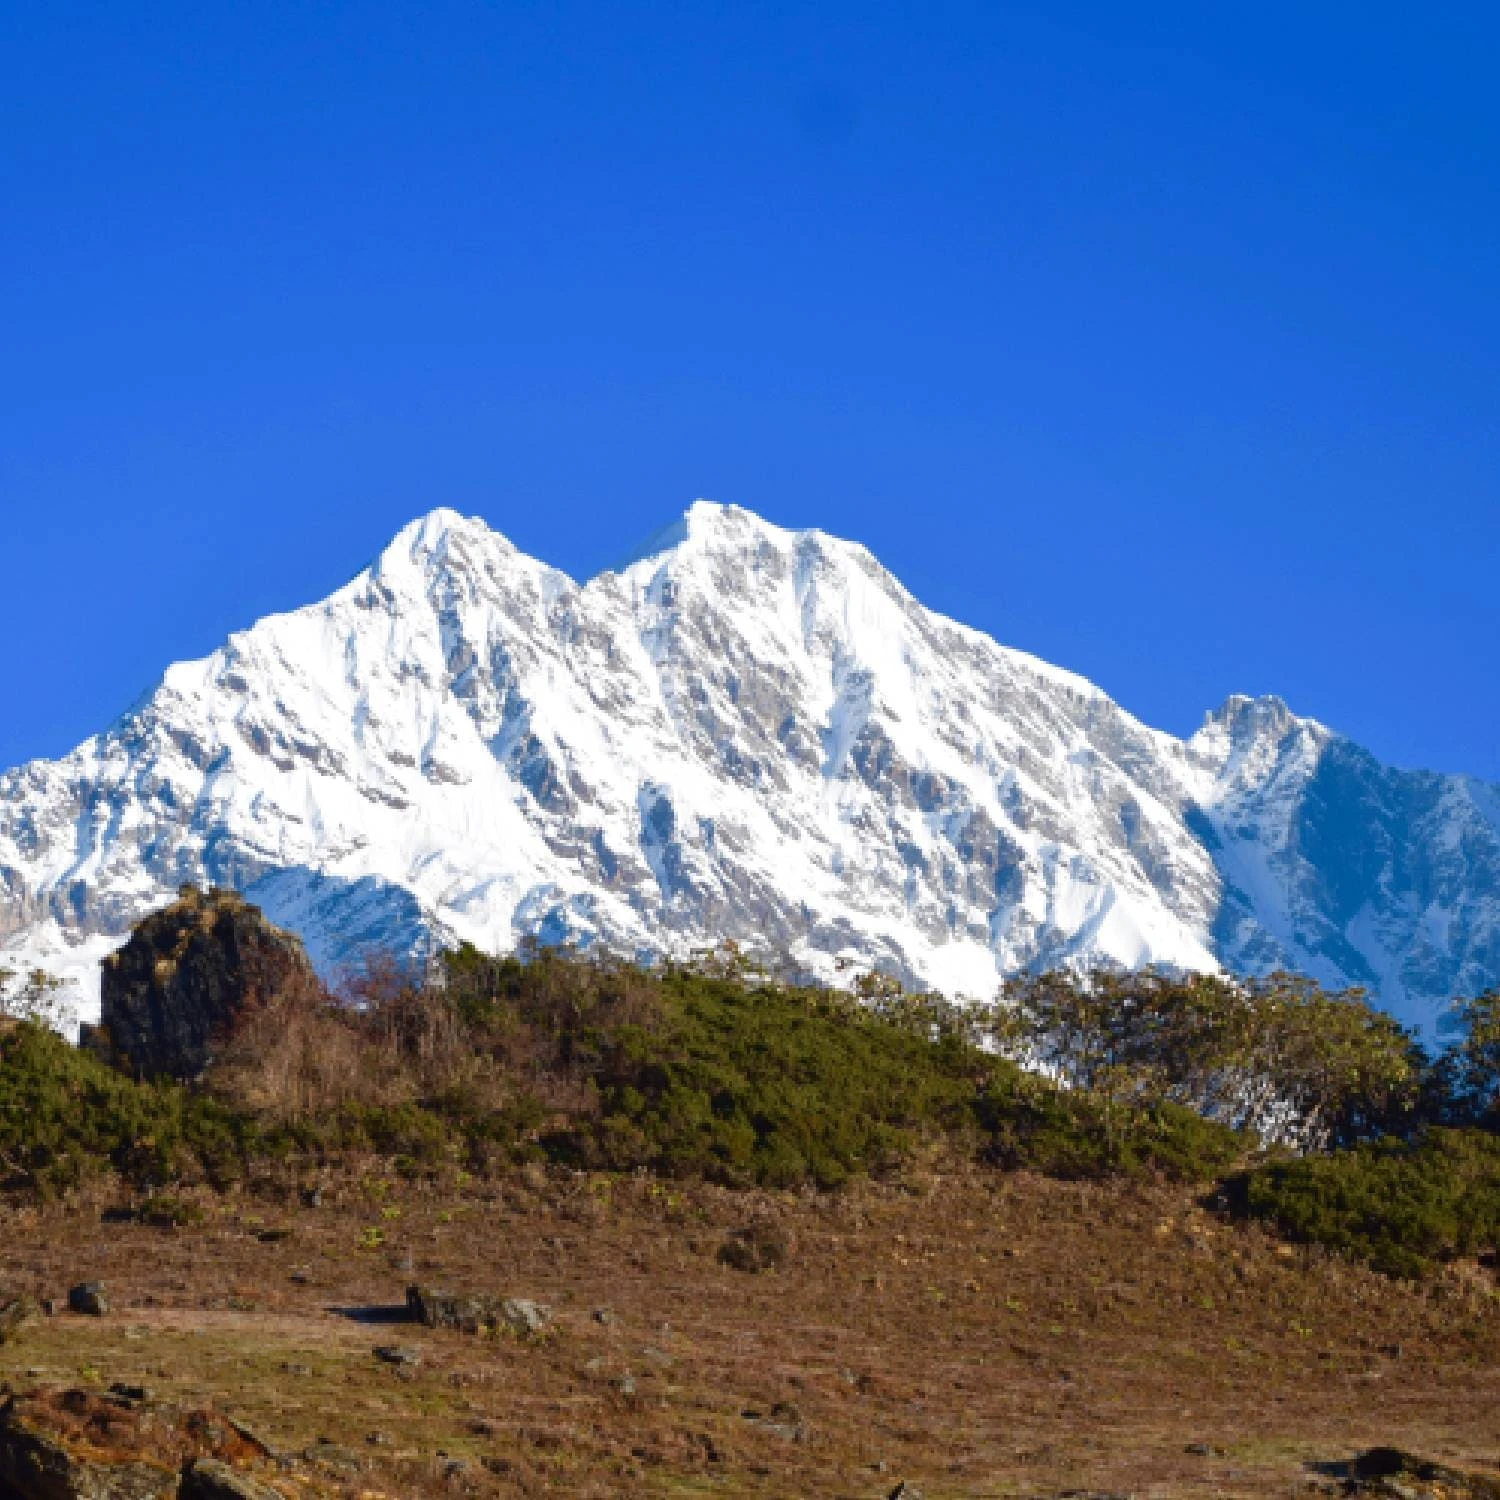
The top of the peak offers you the breath-taking views of the Manaslu and its surrounding peaks. You will pass via the scenic traditional villages, rhododendron forests, and high-altitude landscapes.
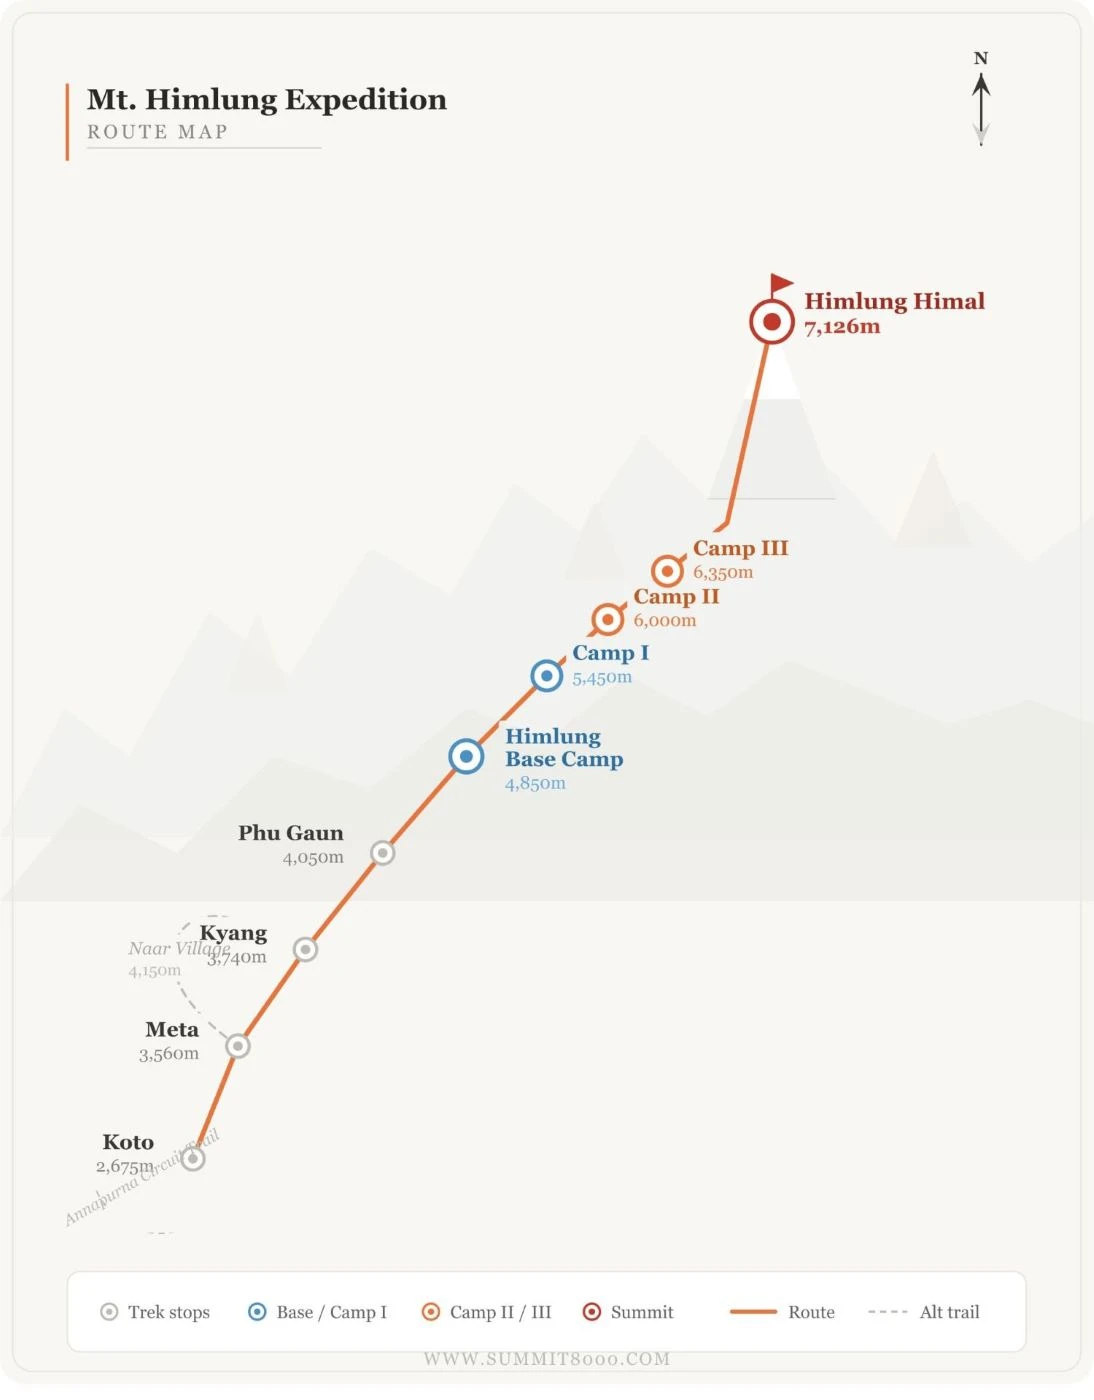
Your expeditions start from the Kathmandu valley from where you will drive to the Dharapani and then trek to the standard Nar Phu route which includes the Koto village(2670m), Meta village (3650), Phu village (4400) and the Himlung base camp at an altitude of the 4850 meters above the sea level.
Key Facts about Himlung Himal
| Category |
Details |
| Peak Name |
Himlung Himal |
| Altitude |
7,126 meters (23,379 ft) |
| Location |
Nar Phu Valley, Manaslu Region, Nepal |
| Region Type |
Restricted Area (Special Permit Required) |
| Climbing Difficulty |
Moderate (Ideal 7000m training peak) |
| Best Season |
Spring (March–May), Autumn (Sept–Nov) |
| Expedition Duration |
25–30 Days |
| Base Camp Height |
4,850–4,900 meters |
| Route |
Nar Phu Valley / Koto – Phu – Base Camp |
| Permit Requirement |
Restricted Area Permit + Climbing Permit |
| Average Cost |
USD 7,000 |
| Success Rate |
High (compared to other 7000m peaks) |
| Best For |
Preparation for 8000m peaks like Everest |
Why Shall you climb the Himlung Himal in 2026/2027?
Climbing the Himlung Himal in 2026/2027 is all about the adventure, training, experience and the hard work. The climb will act as the ideal experience for you if you want to have the prior experience of climbing before climbing the 8000 meters giants such as the Dhaulagiri Peak, Annapurna peak, Ganesh Himal and the Tibetan Plateau.
The Himlung expedition is less challenging than any other climbing peaks which gives you can edge to practice for your future summits. You will be climbing the peak with the balanced safety and support which boosts your confidence, self-esteem and the self-awareness about your physical strength.
The climbing of the Himlung Himal offers a rare blend of adventure, challenge, scenic beauty, cultural depth, and the climbing progressions which will make you feel one of the most rewarding peaks for ambitious climbers who want to take their journey on the next level in the mountains.
Himlung Himal Expeditions Costs
The cost of a Himlung Himal expedition does not depend on a single factor; it is influenced by many elements, including the type of expedition, whether it is private or in a group, the season, permits and government fees, logistics and transportation, guides and support staff, accommodation and food, safety and communication, gear and equipment, and the fees charged by the climbing agency.
You can except the cost to be around 7000 USD to 15000 USD depending upon the services.
Best Season for Himlung Himal
The best seasons of Himlung Himal is during the peak seasons of trekking and climbing in Nepal. Mainly two seasons are highly suggested for the summit which is the during the Autumn (September to November) and Spring (February to May).
During this time of the season the sky is clear which gives the perfect views of the mountains from the distance. The trails are in good conditions after the Manson and Winter. The weather is predictable which helps you to decide whether you shall summit or not.
The temperatures are moderate due to which you can climb and trek without getting too sweaty or without getting too much cold.
Photography and Scenic Views
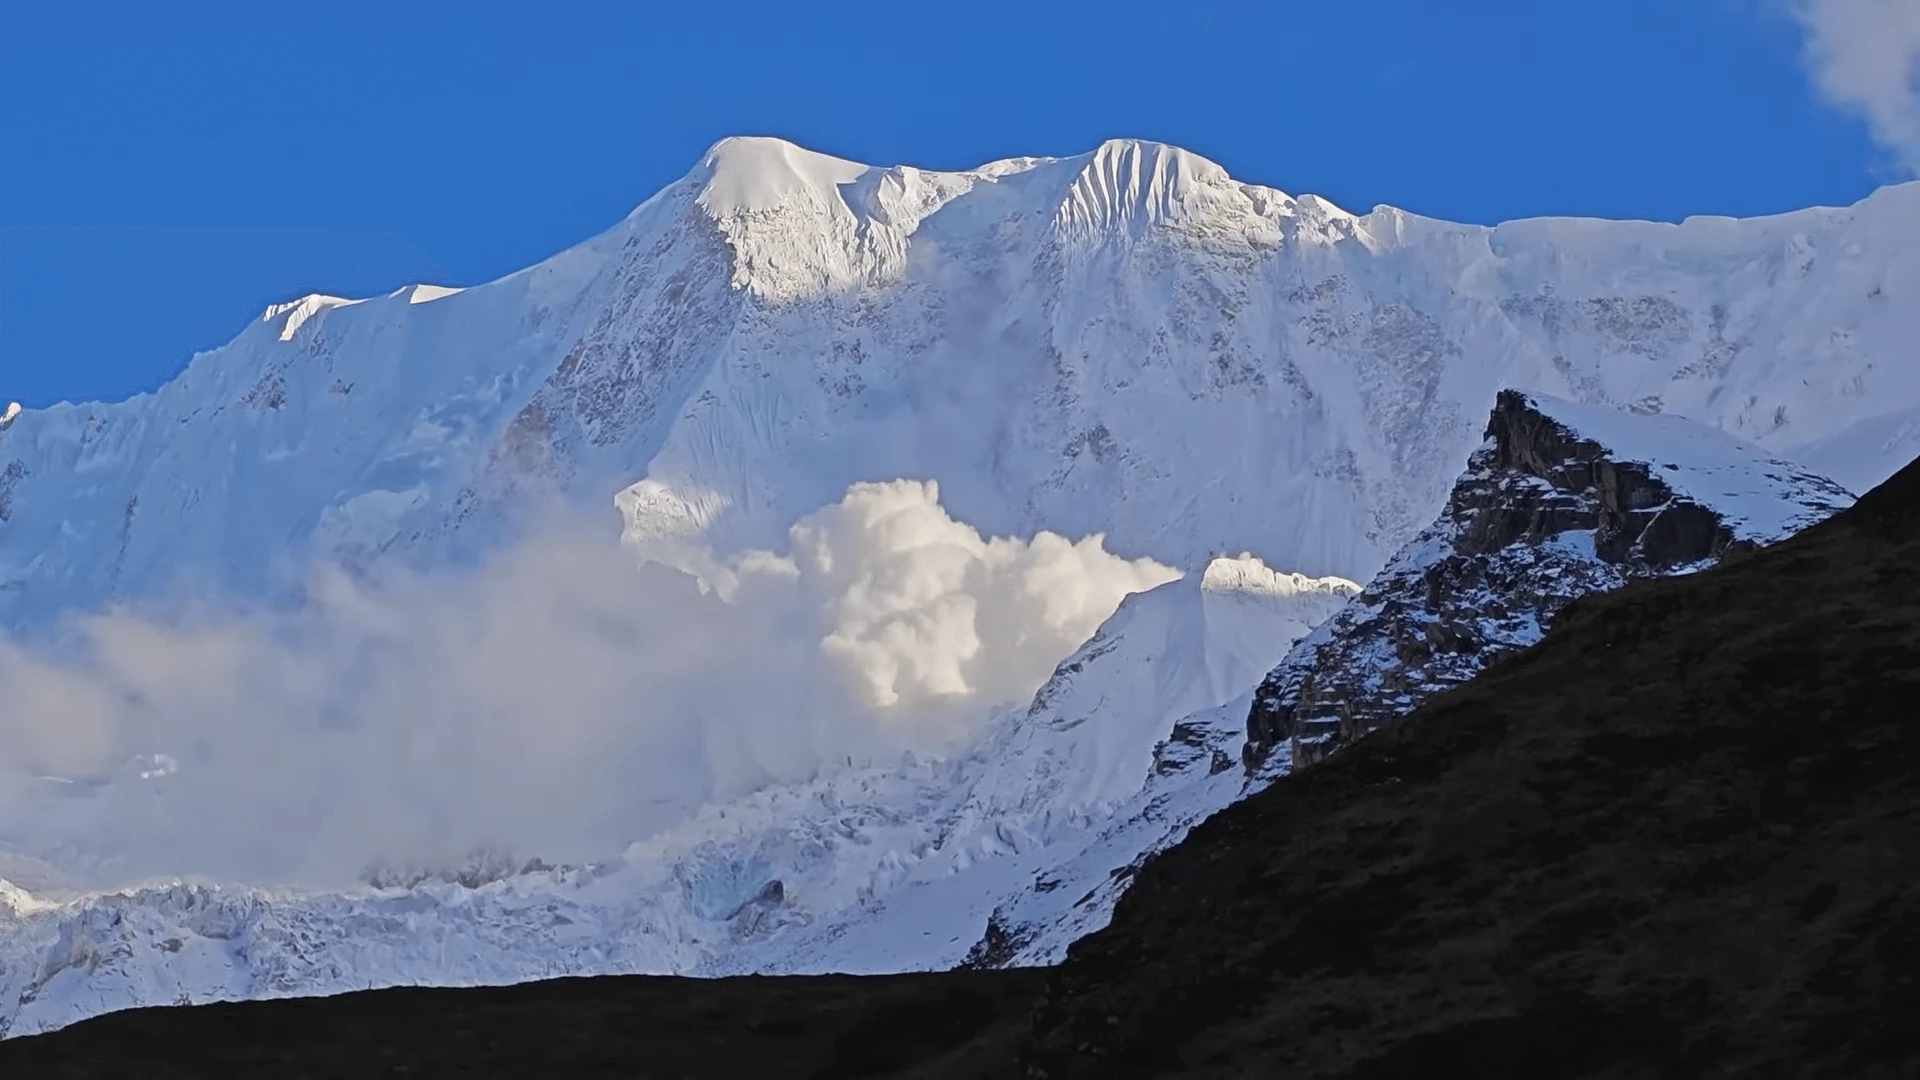
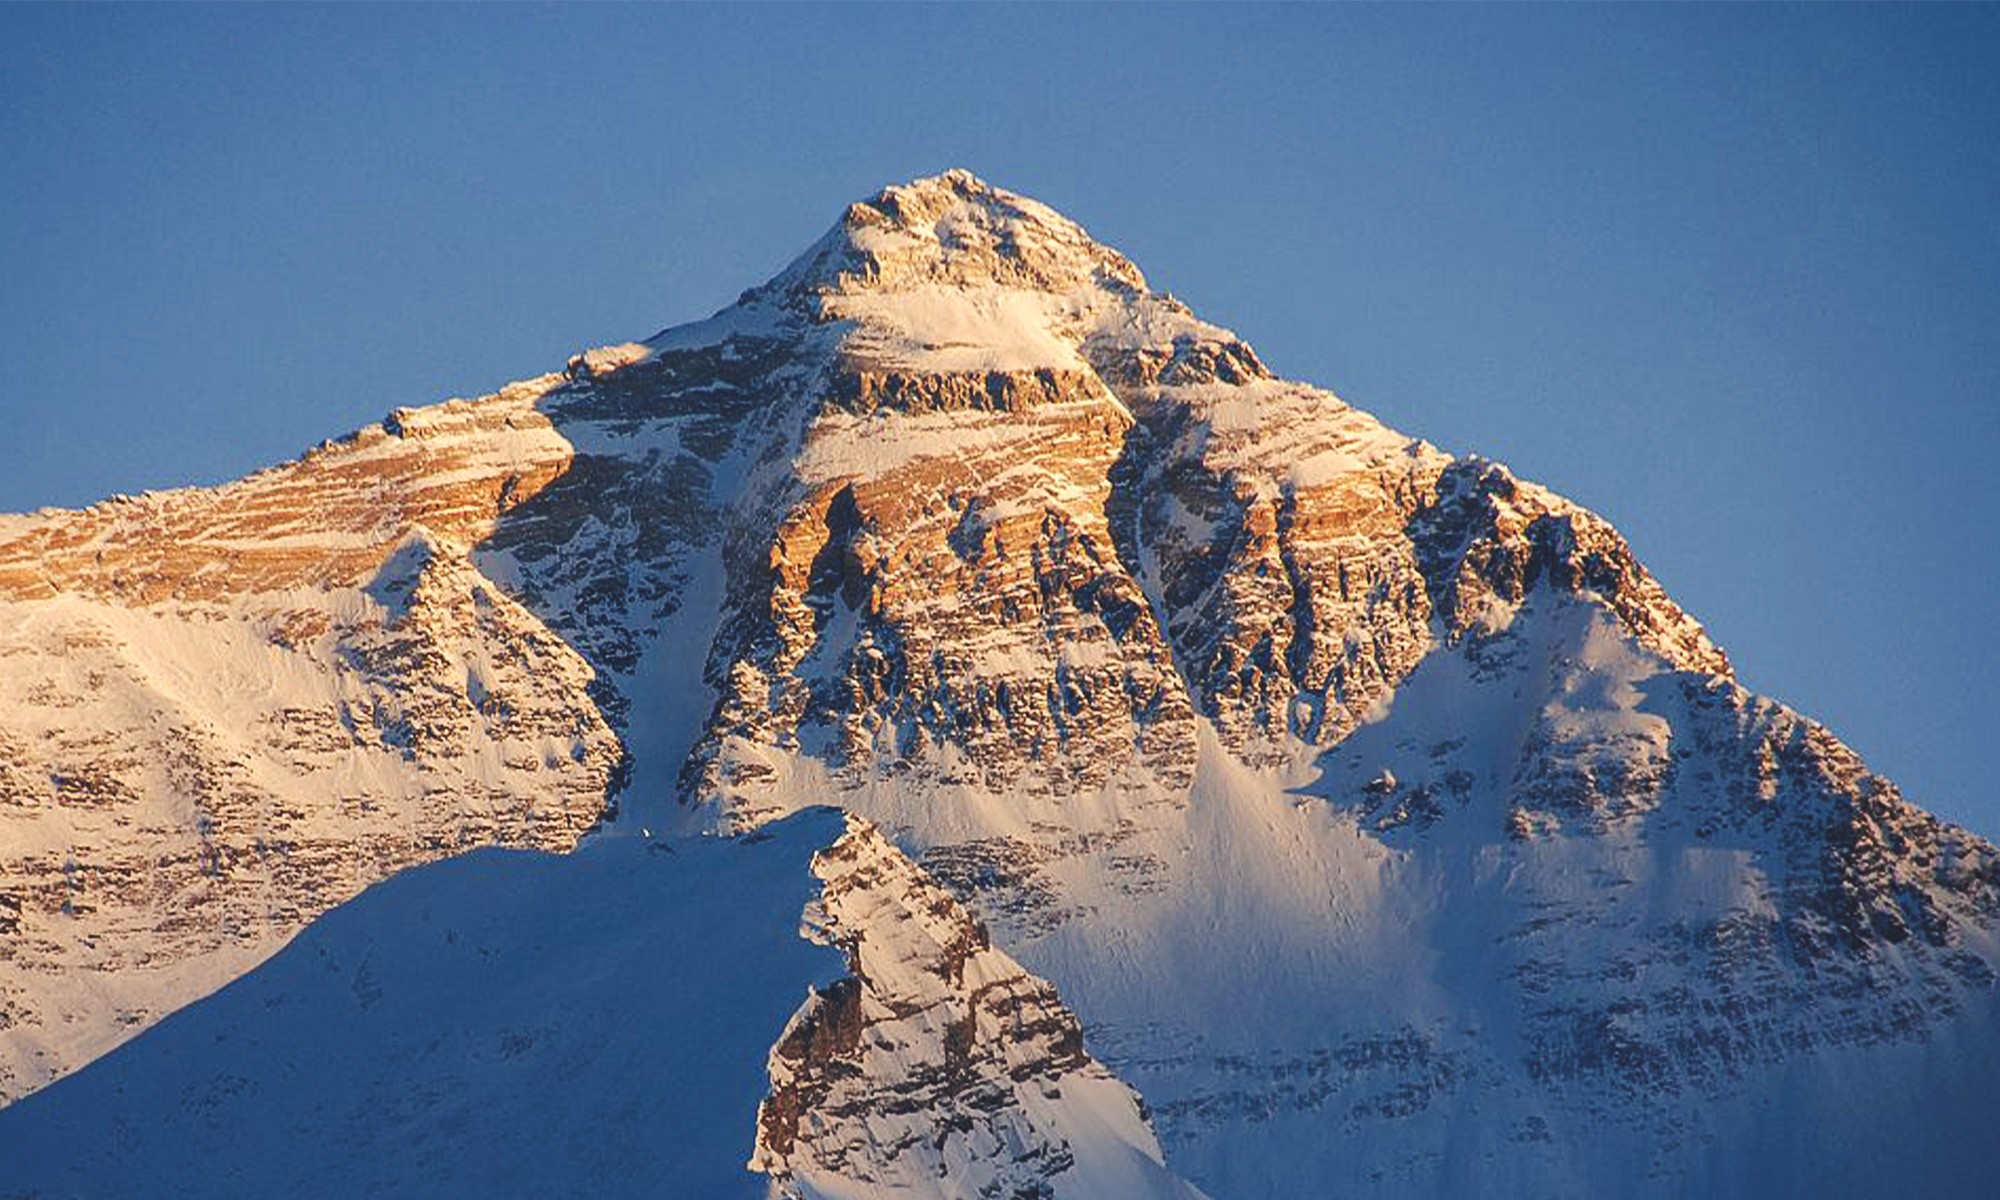
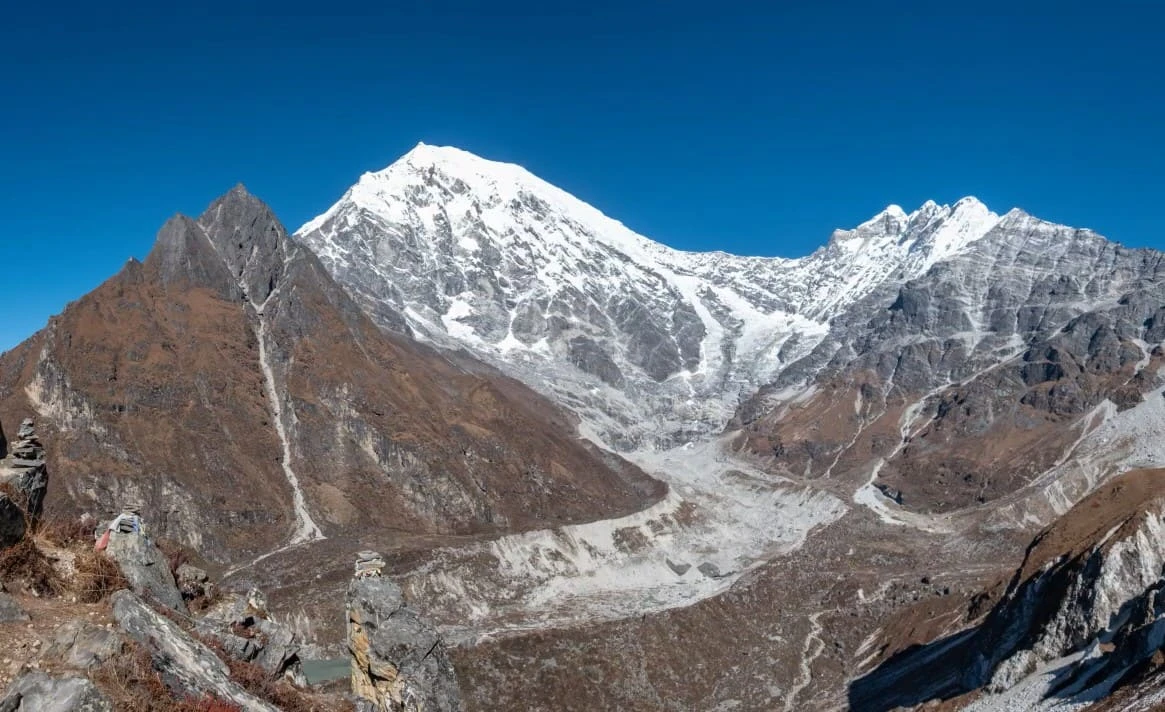
Himlung Himal offers some of the most spectacular photographic opportunities in Nepal. From the base camp to the summit, you will witness panoramic vistas of the Manaslu range, Annapurna peaks, and the Tibetan plateau in the distance.
The trek passes through traditional villages, ancient monasteries, rhododendron forests, and high-altitude landscapes that change with every elevation gain. Sunrises and sunsets on Himlung Himal are particularly mesmerizing, casting golden and pink hues over the snow-clad peaks. Photographers and adventure enthusiasts alike will find every step of this journey visually rewarding.
Cultural Experience Along the Route
The Himlung Himal expedition is not only about climbing but also about immersing yourself in the rich culture of the Manaslu and Nar Phu regions. Trekkers encounter remote villages where Tibetan-Buddhist traditions thrive. You will meet local families, explore monasteries, and witness festivals, rituals, and daily life that have remained unchanged for centuries.
This cultural interaction adds a unique dimension to the expedition, making it a holistic Himalayan experience.
Physical Preparation and Training
Climbing Himlung Himal requires proper physical and mental preparation. Trekkers should focus on cardiovascular endurance, strength training, and high-altitude acclimatization before the expedition. Practicing with smaller peaks, long-distance trekking, and weighted hikes will help prepare your body for the demanding ascent.
The gradual climb from base camp to summit ensures a steady acclimatization, reducing the risk of altitude sickness while allowing climbers to understand their limits and improve stamina.
Why Choose Himlung Himal?
Himlung Himal is ideal for climbers who want a balanced expedition combining adventure, scenic beauty, cultural immersion, and high-altitude experience without the extreme challenges of the 8000-meter peaks. It acts as a gateway to higher Himalayan climbs, helping climbers gain confidence, improve technical skills, and prepare for future summits.
Whether you are an aspiring high-altitude mountaineer or an adventurer seeking breathtaking landscapes, Himlung Himal offers a rewarding journey that few other peaks can match.
What It Actually Feels Like to Climb Himlung Himal
The first thing that surprises most climbers is the silence. Not the silence of an empty room but the deep, pressing silence of a valley that sees fewer than 1,000 visitors a season. From the moment you enter the Nar Phu Valley, Himlung Himal stops feeling like a destination on a list and starts feeling like somewhere you were meant to find.
The trek in is deceptively gentle. Villages like Koto and Meta ease you into the mountains slowly, with warm tea houses, curious locals, and rhododendron forests that smell nothing like altitude. You almost forget you are walking toward a 7,126-meter peak.
Then base camp arrives at 4,850 meters and the mountain reveals itself.
The air is thinner than most people expect, even for those who have trekked above 5,000 meters before. Your first acclimatization rotation up to Camp 1 is humbling not because the terrain is brutal, but because your lungs remind you, very clearly, that you are a guest here.
The climbing itself is what expedition leaders call "a technical education." Fixed ropes guide you through the glacier sections. Crampons bite into hard snow at angles that would make your knees buckle on flat ground. But the mountain is forgiving in a way that Everest or Dhaulagiri simply are not. There is room to make mistakes, to learn, to slow down.
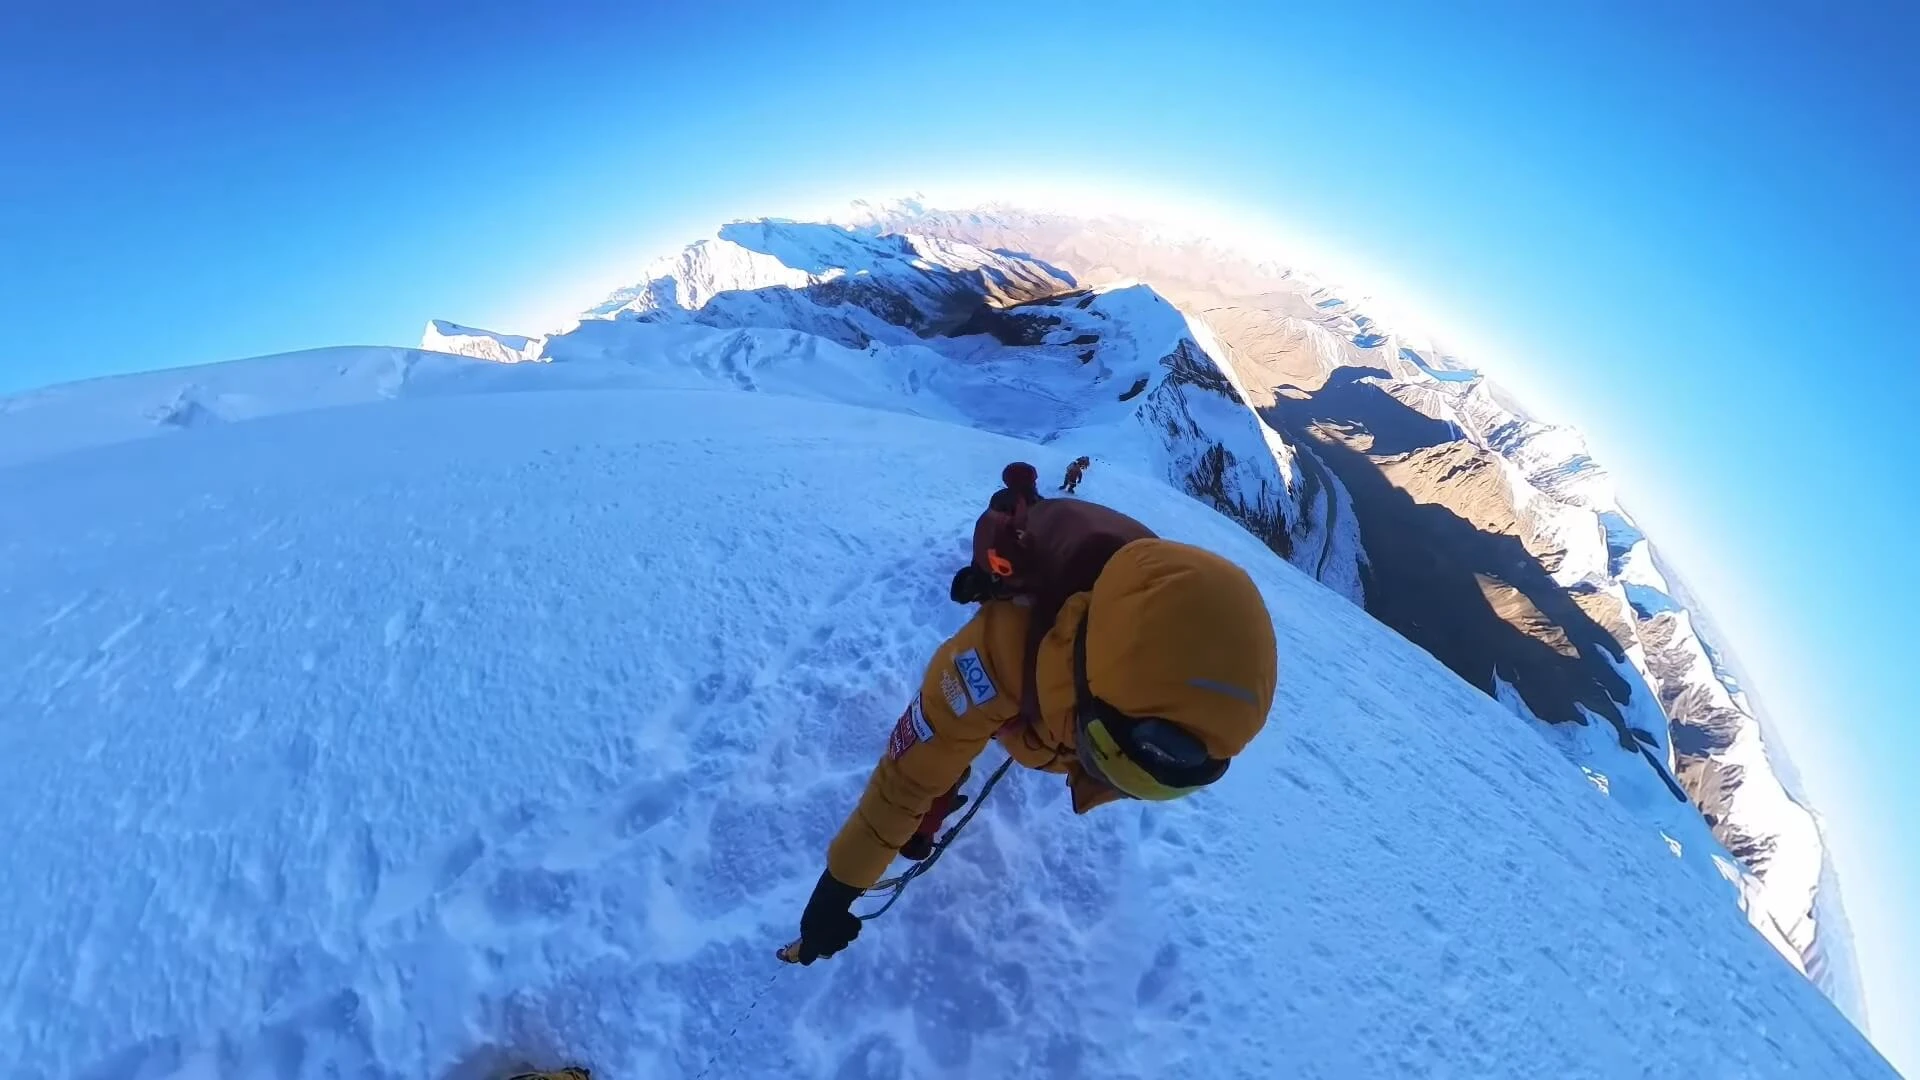
Summit day starts between midnight and 2 AM. The cold at that hour is not dramatic it is simply absolute. Your headlamp shows you only the next two meters of rope. You follow it. One step, breathe. One step, breathe.
And then the ridge opens and you are above everything.
The views from Himlung's summit take in Manaslu, Annapurna, and on clear days the faint white line of the Tibetan Plateau. But most climbers say the same thing when they come down: it wasn't the view that stayed with them. It was the quiet proof that their body could do something they were not sure it could.
That feeling does not leave quickly.
Himlung Himal vs Other 7000m Peaks: A Technical Comparison
Choosing your first or next 7,000-meter peak is one of the most important decisions a high-altitude climber makes. Here is how Himlung Himal compares honestly against the most popular alternatives.
Himlung Himal (7,126m) vs Mera Peak (6,476m)
Mera Peak is the natural step before Himlung. It is Nepal's most popular trekking peak, requires no fixed rope experience, and sits 650 meters lower. If you have summited Mera and want the next level of commitment longer glacier travel, fixed ropes, multi-camp rotation, and genuine high-altitude exposure Himlung is the logical progression. The jump in technical difficulty is real but manageable with proper preparation.
Himlung Himal (7,126m) vs Baruntse (7,129m)
These two peaks sit at almost identical altitudes and are often compared. Baruntse is considered slightly more technical due to its steeper ridgeline and more exposed summit approach. Himlung offers a more gradual learning curve on the glacier sections, making it the better choice for climbers who have completed 6,000-meter peaks but have limited fixed-rope experience.
Himlung Himal (7,126m) vs Mustagh Ata (7,546m)
Mustagh Ata in China is often marketed as a "non-technical" 7,500-meter peak. While it requires no roping up, the sheer altitude and extended time above 7,000 meters makes it physiologically harder than Himlung. Himlung wins for climbers who want to develop actual mountaineering technique rather than simply enduring altitude.
How to Train for Himlung Himal in 6 Months?
Six months is enough time to prepare for Himlung Himal if you train with intention. This is not a peak you can hike your way up. Your cardiovascular system, leg strength, and mental resilience all need deliberate work. Here is a month-by-month framework that expedition guides actually recommend.
Month 1 — Build Your Base
Start with consistent aerobic work five days a week. Running, cycling, or swimming for 45–60 minutes at a conversational pace. The goal this month is not intensity it is building the habit and the base. Add two strength sessions per week focusing on legs, core, and posterior chain: squats, lunges, deadlifts, step-ups with weight.
Month 2 — Introduce Elevation and Load
Begin weighted hikes on any available hills or stairwells. Start with 8–10kg in your pack and increase by 2kg every two weeks. If you live in a flat city, stadium stairs or treadmill incline at maximum grade works. Weekend hikes of 3–4 hours become your most important sessions. Your legs need to learn sustained output, not sprint effort.
Month 3 — Increase Volume and Vertical
This is where serious preparation begins. Weekend hikes extend to 6–8 hours with 12–15kg. Midweek runs increase to 60–75 minutes. Add one long uphill interval session per week 10 x 3-minute hard efforts on a steep grade with 2-minute recovery. Begin sleeping with a mild altitude simulation if accessible (altitude tents start showing benefit above 2,500m simulated).
Month 4 — Simulate Expedition Conditions
Plan a multi-day trekking trip above 3,500 meters if at all possible. Langtang Valley, Annapurna Base Camp, or any accessible high-altitude route works. The goal is to observe how your body responds to real altitude sleep quality, appetite, headaches, energy levels. This data is more valuable than any training metric. Continue weighted hikes and strength work.
Month 5 — Peak Training Load
Your hardest month. Long hikes of 8–10 hours with 15–18kg on weekends. Midweek sessions include one speed-endurance run (75–90 minutes at moderate effort), one interval session, and one strength session. Recovery becomes as important as training sleep 8 hours, eat enough protein (1.6–2g per kg of bodyweight), and manage stress carefully. Fatigue at this stage is expected. Injury is not back off if something hurts.
Month 6 — Taper and Sharpen
Reduce volume by 30–40% but keep intensity. Two or three quality sessions per week rather than five or six grinding ones. Focus shifts to gear familiarity practice with crampons, ice axe, harness, and layering systems on any available snow or glacier. Mental preparation matters here too: read accounts from Himlung climbers, study the route, visualize the summit push. Arrive at Kathmandu rested, not exhausted.
Key fitness benchmarks before you go:
- Comfortable hiking 6+ hours with 15kg pack
- Able to ascend 1,000m vertical meters without stopping
- Resting heart rate below 60 bpm
- Prior experience above 4,500 meters with no serious altitude sickness history
A Climber's Honest Diary: Kathmandu to the Summit of Himlung Himal
Day 1 — Kathmandu
The city hits you before the mountains do. Thamel is loud, dusty, and alive in a way that makes your nervous system work harder than it should the night before a big expedition. I spent the afternoon rechecking gear I had already checked four times at home.
My expedition leader sat with us over dinner and said something I kept coming back to later: "The mountain will ask you a question somewhere above Camp 2. Make sure you know your answer before you leave base camp." I did not fully understand what he meant yet.
Day 3 — Drive to Koto (2,670m)
Eight hours in a jeep on roads that alternate between paved and theoretical. The scenery compensates completely. By the time we reached Koto, the Himalayas had replaced the horizon entirely. I slept better than I expected.
Day 4–6 — Trekking into Nar Phu Valley
This is where Himlung separates itself from every other expedition I had read about. The Nar Phu Valley is genuinely remote. Mobile signal disappears. The villages Meta, Kyang feel like places that time approached and then politely turned around. Local families watched us pass with curiosity rather than the weariness of communities overrun by trekkers. At 3,650 meters in Meta, my appetite dropped and my sleep became shallow. First signs.
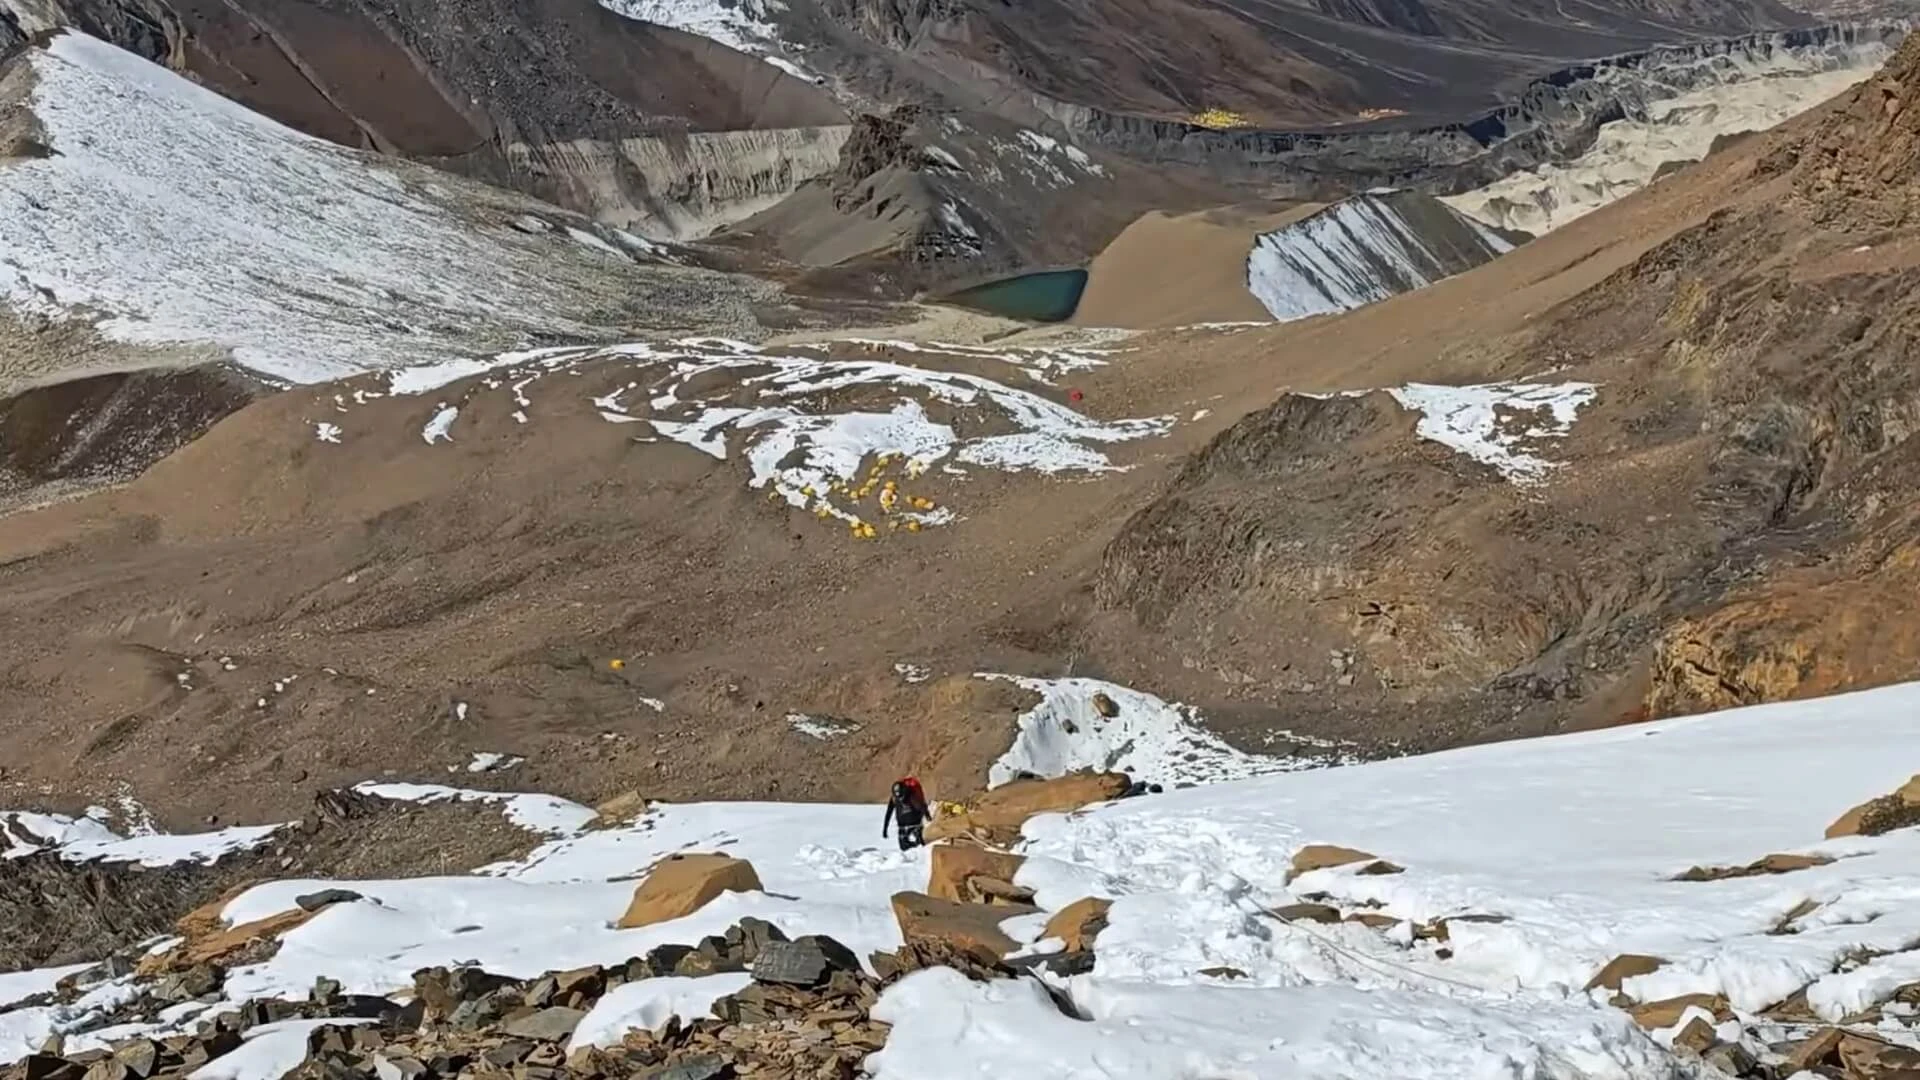
Day 8 — Base Camp (4,850m)
The tents were already set when we arrived, orange against the grey moraine. I stood outside mine for a long time looking at the upper mountain. From here, the summit looks both closer and more serious than photographs suggest. The scale becomes real. That evening I ate half of what I normally would and went to bed at 7:30 PM.
Days 9–14 — Acclimatization Rotations
We climbed to Camp 1 at around 5,800 meters and descended. Then to Camp 2 at approximately 6,400 meters and descended again. This is the part of high-altitude climbing that nobody's Instagram shows the repetition, the boredom at base camp between rotations, the headaches that come and go without warning, the conversations with your body about whether this is actually a good idea.
On the second rotation I hit what climbers call "the wall" somewhere above 6,000 meters. Not a physical wall exactly more like a conversation between your ambition and your biology, conducted entirely in lactic acid. I sat on the fixed rope for six minutes and did nothing. Then I kept climbing.
Day 18 — Summit Push Begins
We left base camp at 4 AM for our final camp rotation before summit day. The mountain was quiet in the way that only very cold, very high places are quiet. By Camp 2 the wind had picked up but our guide read it as manageable. We slept barely at 6,400 meters. Real sleep at that altitude is less sleep and more a negotiation with unconsciousness.
Summit Day
1:15 AM. The coldest I have ever been while moving. My headlamp showed the fixed rope disappearing upward into darkness and I followed it with the particular focus that extreme altitude forces on you nothing exists except the next step, the next breath, the rope in your hand.
The ridge at dawn.
I cannot fully describe what happens when you arrive at a summit after weeks of working toward it. The Manaslu massif was directly in front of me, enormous and indifferent. Annapurna was to the west. Somewhere behind a thin haze, Tibet. My legs were shaking slightly and I was crying without having decided to.
My guide gave me four minutes. Then we turned around.
The Descent and After
Coming down is faster and stranger. The mountain looks different from below. Back at base camp I ate an entire pot of noodles and slept for eleven hours. The next morning I felt, more than anything else, quiet.
That question my expedition leader mentioned on Day 1 in Kathmandu I understood it by Day 18. The mountain does ask you something above Camp 2. It asks whether you actually want this, stripped of every story you have told yourself about why.
I did want it. That answer was enough.
Himlung Himal Expedition Outline Itinerary (30 Days)
| Day |
Location / Activity |
Altitude |
Details |
| Day 1 |
Arrival in Kathmandu |
1,350 m |
Airport pickup, hotel transfer, briefing |
| Day 2 |
Trek Preparation in Kathmandu |
1,350 m |
Gear check, permits, team meeting |
| Day 3 |
Drive to Koto |
2,670 m |
Scenic drive through hills & villages |
| Day 4 |
Trek to Meta |
3,650 m |
Forest trails, gradual altitude gain |
| Day 5 |
Trek to Kyang |
3,800 m |
Remote landscapes & mountain views |
| Day 6 |
Trek to Ohu Gaun |
4,000 m |
Enter deeper Nar Phu Valley |
| Day 7 |
Acclimatization Day |
4,000 m |
Rest + short hikes for adaptation |
| Day 8 |
Trek to Base Camp |
4,850 m |
Arrive at Himlung Base Camp |
| Day 9–25 |
Climbing Period |
Up to 7,126 m |
Rotation, training & summit push |
| Day 26 |
Trek back to Meta |
3,650 m |
Descent with easier breathing |
| Day 27 |
Trek to Koto |
2,670 m |
Return through familiar trails |
| Day 28 |
Drive to Kathmandu |
1,350 m |
Long scenic drive back |
| Day 29 |
Free Day in Kathmandu |
1,350 m |
Rest, explore, celebration |
| Day 30 |
Departure |
— |
Transfer to airport |
Plan Your Himlung Himal Expedition for 2026/2027
Are you planning your Himlung Himal climbing dream for 2026 or 2027? If yes, book now with our expert Sherpa team and turn your expedition into a safe, successful, and unforgettable Himalayan experience.
